Thursday, April 29, 2010

JBS Mercantile May Guest Debee Campos!

Hi I'm Debee ;P

I enjoy making art and scrapbooking in my little studio in San Diego, California. I love using spray paints and my sewing machine on everything I make. My favorite style is anything urban and grundgy. I am a Graphic Designer by day and LOVE to make my own art after work hours. After being behind a computer most of the day I love getting home and getting my hands and clothes dirty while getting creative & expressing myself on paper. And hanging out with Mr.Handsome :) I firmly believe, If there was no art, I'd loose my mind :) I'm so thankful for this wonderful opportunity to share my art with you!

my blog: http://debeecampos.blogspot.com/

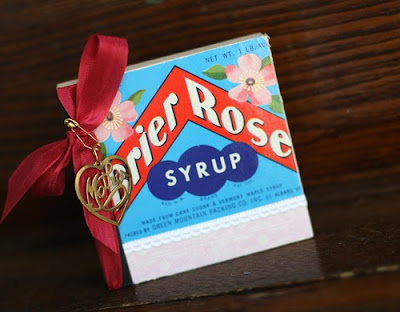
I've been crazy over bird houses lately. I have no birds but i do love the little houses. They are so CUTE! I just had to make a little one for my studio. I think it plays well and looks pretty adorable. Love all the pretty JBS papers. They were just perfect with some crazy sewing and fun layers.

It's been almost a year since Mr.Handsome and I ventured into the world of owning a home. We have 2 spare rooms and he gladly gave me my own little room for my studio. :)

I enjoy crafting, crochet and scrapbooking but i originally went to art school so I have so many mediums all in one place. And i also work from home plus have an etsy store where I sell my creative art so this studio can get pretty messy at times :) But rather than put everything away and hide all the mess. I choose to play and enjoy it. My little corner of the world is full of bright happy colors. Sparks my creativity and relaxes my mood. there's no other place i'd rather be.

Thanks for the inspiration Debee! Everything is so very pretty. :)
Pin It!

Tuesday, April 27, 2010

Take a Moment by Wilna Furstenberg

I think being a mom is one of the most dedicated jobs out there. I think you know what I mean by calling it a "job". Maybe labour of love is more appropriate. We tend to give and give and give and forget about ourselves sometimes. That's one thing i learned this past week while driving my girls to and from the Dance Festival. I was their everything. In the process I did not drink enough water, I didn't exercise enough, I didn't have a moment just for myself to reflect and give thanks. So today my challenge is to all you busy moms: Make a page about you and give yourself a moment and some room to just BE. Write down something that you are going through or are thankful for. I know it sounds like a cliche... but we desperately need these moments. I know that just sitting down to make this page was such a moment for me.

Love and a kiss,
Wilna

Thanks for the inspiration and words of wisdom Wilna!
Pin It!

Keisha Pretties

More inspiration for your (sold out) April kits. (There are a couple add-on kits still available).

Thanks for the inpspiration Keisha!

Pin It!

Sunday, April 25, 2010

JBS Mercantile May Peeks!

Ranjini Malhotra

Danielle Flanders

This kit is so much fun to work with! Loving the bright hued candy colors against the rich chocolate brown . . . delicious!
Pin It!

Saturday, April 24, 2010

JBS Mercantile May Exclusives!

Check back for sneak peeks tomorrow! You're going to love them! :)
Pin It!

Friday, April 23, 2010

Butterfly Bouquet Tutorial by Cheryl Ametewee

butterflies are my favorite thing to work with in my art right now (and if you have ever seen my layouts, you will know this to be true)...i use them on layouts, home decor projects and anything else i can dream up in my mind. i just feel like they add such an amazing touch of whimsy and lightheartedness to any project...which is why i have loved the JBS Butterfly Chipboard from the moment i laid eyes on them. i have more ideas for projects using these butterflies than i could ever dream of completing. :) but for this one, i created this vintage milk jar butterfly bouquet to go on our kitchen table. our kitchen is the least decorated room in our home and only has a few red accents to go with the apartment's cream walls, which made the navy and turquoise accents the perfect punch of color...and the signature jenni bowlin vintage pulls the cream walls in and makes them look less drab.


to create the butterflies i used mini papers to cover 3 of the 4 pieces of chipboard. but because the actual chipboard pieces are larger than the 4x4 mini papers i traced only half and had them overlap a bit in the middle when gluing them down without worrying about how it looked because i knew i was going to add vintage accents to represent the body of the butterflies. (to create the bingo card butterfly i followed all these same steps except the bingo cards are big enough to create an entire butterfly.) next i sanded and inked around the edges of each butterfly before adding the embellishments. for the bodies i used the buttons and pearl flowers in a single line, making sure to do each one in a little different order for uniqueness and visual interest. i also folded and crunched up some of the crepe ribbons under the stickers to give a 3-D textured effect. finally i added the pins as antennas, glue-dotted the kabob sticks to the back and cut and tied the turquoise netting (left over from my turqouise wedding dress!) around the sticks before placing them in the milk-jar.

to create the butterfly made with mostly crepe paper, i traced just the center of the butterfly and glued the cut-out mini-paper onto the chipboard before wrapping the ribbon around the wings of the butterfly. (i love how the edged ribbon gives such great wing-like texture to the bottom halves of the wings!) i then followed the same procedure of creating the body of the butterfly with the pearls and buttons, adding the stick-pin antennas and finally adding the stick and netting.

and finally, before placing the butterflies inside their new home in our boring little kitchen, we took them onto the back patio and used them in a little rainy-day photoshoot. see what i mean? endless butterfly possibilities!
-cheryl :)


Supplies:
Butterfly Chipboard
Mini-Papers: Farmers Wife and Tangerine Dream
Bingo Alpha Tiles: Brown
Crepe Paper Ribbon: Turquoise, Navy & White
Superior Stick Pins: Garnet
Rhinstone Buttons: Red and Clear
Pearl Flowers: Maraschino & Cantaloupe
Other: Red Ink, Turquoise Netting & Vintage Lace

Whimsical and Wonderful! Thanks for the inspiration Cheryl!
Pin It!

JBS Spring Vintagefest!

Shop your heart out tomorrow . . . 9a.m. to 9p.m. Vintage Scrappies and Antique Treats!
Pin It!

Wednesday, April 21, 2010

Adore by Danielle Flanders

I used the May project kit (coming soon), along with the Kaiser photo holder from last month to create this little photo display. I added the Jenni Bowlin gems and buttons from my stash and the little wooden clips.

To cover the base, I painted it with black acrylic paint very loosely to let some of the natural color show through, covered some of the background with the papers and the Adore card from the project kit, and then added the clips, so the photos can be easily changed out. I can't wait to give this to my mom for Mother's Day!

You can dress up a cute little wooden clip with a fabulous vintage button by Jenni Bowlin. I wanted to add clips to this project, so the photos can be easily changed out. I like how the natural color looks with the black.

I embossed the large chipboard heart from the project kit with my Cuttlebug machine and the Swiss Dots folder. To get a fuller looking bow, tie the ribbon around the heart in a bow and then tie again to form another bow (one on top of another). I attached the flower and then tied the twine over the top for added layers and interest.
Another fabulous Mothers' Day project! Thanks so much for the inspiration Danielle!
P.S. Did you know Danielle will be teaching at Reflections in California soon? Check her blog for details!
P.S.S. Last month's project kit (which contains the display piece Danielle used on this project) is still in stock, but supplies are limited.
Pin It!

Monday, April 19, 2010

Going Hybrid with Betsy Sammarco

Betsy shows us how to go hybrid again this month using JBS digital products from ScrapHD plus traditional scrapbooking products from JBS Mercantile's General Store. You can see more of Betsy's digital JBS pages HERE. Thanks for the inspiration Betsy!

Pin It!

Sunday, April 18, 2010

If You're Still Waiting for Spring....


Living in Colorado, we often get teased by Mother Nature. March rolls around and she'll give us several days of gorgeous sun, crisp breezes, birds chirping, and buds starting to blossom. Then, just like that, she'll dump a huge snowstorm on us and all signs of spring will be covered in the white stuff! I've learned not to put away the snow boots and shovels until May arrives. And instead of waiting for spring to appear outside my door, I'll bring the season to life on my scrapbook pages!

If you're still waiting for spring in your neck of the woods, pull out some brightly colored papers, and anything with butterflies or flowers and get to work on a page! For my page, I used one of my favorite JBS papers, Green Cross Hatch from the Front Porch line and mixed in some Turquoise Tiny Dot and the Pink Soda Label to make a pennant banner. Then I covered some chipboard letters with the pink JBS tickets and made a few simple flowers from the Turquoise Crepe Paper Ribbon. I love the crisp look of the white chipboard butterfly and originally I was going to use it on the page as is. But then I thought it might look more interesting covered in various sizes of clear buttons. I love the subtle bit of texture and sparkle it adds! The finishing touch was to add two of the Cream Stick Pins as antennae.

I'd love to see what spring-inspired creations you can make with Jenni Bowlin goodies, so be sure and link them here! And Happy Spring!

Delightful! Thanks for the inspiration Lisa!

Pin It!

Thursday, April 15, 2010

Dina Wakley Extravaganza!

Two Layouts + A Mini = Delightful! Thanks for the inspiration Dina!


Pin It!

Wednesday, April 14, 2010

Baby Mine by Ranjini Malhotra

I love to keep all the unused extras from JBS Monthly kits so I can create a random layout when the inspiration strikes. On this one, I simple added the Baby Girl diecut label paper on the edge as a border and then used the large monogram letter B from a past JBS kit to start off my title. I staggered a few photos underneath and finished it off with a butterfly, a few buttons and an old mini tag from my stash. When creating a layout like this, arrange your text and font work on a document and print it out on copy paper before you print on cardstock; that way you can line everything up and make sure it's all aligned where you want it.

Thanks for the inspiration Ranjini!


Pin It!

Tuesday, April 13, 2010

Thank You Teacher Bookmark by Danielle Flanders

I loved Jenni Bowlin's Bingo Alpha Tile Cards and when I saw them in this month's kit, the alphabet letters gave me the idea of creating something for a teacher. Teachers have so many books, so I thought it would be fun to create a bookmark that slides onto the corner of a book page.
Here are the steps to create this bookmark:
1. Fold the Jenni Bowlin bingo card in half horizontally.
2. Sew the bingo card together by machine sewing down the right edge of the folded card.
3. Cut a piece of red cardstock the same length as the yellow journaling card. Punch the edge with a scallop punch. Attach to top of journaling card and stitch if desired.
4. Stamp "thank you, teacher" with alphabet stamps.
5. Adhere chipboard letters from the kit to spell XYZ. Adhere finished journaling card.
6. Punch a heart from red cardstock. Adhere. Attach button from kit over heart.
7. Slide bookmark onto a book page.

Thanks for the inspiration Danielle!
Pin It!

Monday, April 12, 2010

JBS Mercantile April Updates: Part 2

Cheryl has 5 new layouts and a sweet baby hairclip in her gallery.

Danielle has a new layout in her gallery.

Jenni has a layout uploaded to her gallery (plus the project kit instructions).

Ranjini has 5 layouts in her gallery.

Wilna has 4 layouts in her gallery.

P.S. Check Jenni's blog for updates on Spring Vintagefest 2010!
Pin It!