Showing posts with label feathers. Show all posts

Wednesday, November 27, 2013

Thankful for the friendships...

That I have made with this wonderful craft.

Hello Hello :)

So have you been having awesome creative fun with the Jenni Bowlin Studio November Kits? I have :)  Ive created this fun little mini featuring some of the fabulous friends that I have made  in the industry. Today I would like to share a few of the pages with you.


Ive used some of the awesome Kit Exclusives :) :) :)


Aren't those wood veneers just TDF?!!! :)

And seriously could I be any morse excited about this feather mask?!!!! :) :) :) 

I used the feather die cut to create a smaller version on the mask so that I could create a masked feather pattern on the cover of my mini album :)


Havent the teams creations been all kinds of awesome this month?!! :) :) :)

Dont forget to check out the gallery >>>>>>>>>>>> HERE :) :) :)

Cheers for now and Happy Creating :)

Louise xox
Pin It!

Sunday, November 17, 2013

I am Grateful....

Hi!  Tina here today with a project in celebration of our Gratitude month!

I wanted to take a slightly different approach and create something that could be used throughout the year to capture those Gratitude memories! 


I've created a mini envelope 'album' that will allow you to record and keep your Gratitude memories about your special someone or for your entire family.    Each Grateful pocket will safely store your notes until the time when you want to share your memories with your loved ones.


Nine separate pockets will store your specific memories of how you are Grateful.


My Grateful pockets include:

for secret messages.
for your kindness.
for your understanding.
for your love.
for your sincerity.
for your laughter.
for your support.
for your compassion.
for your thoughtfulness.


What a perfect way to record your memories throughout the year and give a special gift to a special someone.


I added a mini Velcro closure to each envelope for safe keeping.


This is such a easy and quick project, you could create several.  :)

Jenni Bowlin Supplies include:

Feather Tags-Vintage
Paper Tape - Bleached Wood
Paper Tape - Hounds Tooth
Paper Tape - Sideways Chevron
Dotted Labels - Red & Black
Mini Chipboard - Stars
Skinny Alpha Stickers - Grey
Scattered Star Stencil
 Scattered Star Stamp- November Paper Crafting Kit
Star Sticker

I hope you enjoyed by Gratitude Envelope Mini today!  What projects have you created to show your Gratitude?  We'd love to see them!

Thank you for stopping by!  Have a wonderful day!


Pin It!

Wednesday, October 30, 2013

leafy layout..

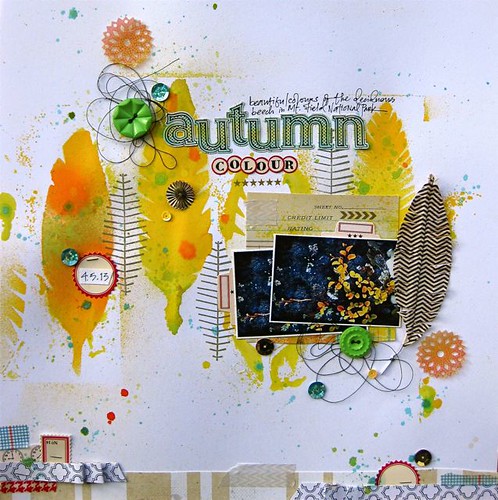
Hi, Gina here sharing a Fall layout with you today..I love to get outdoors here in Australia and photograph the gorgeous Autumn leaves..so I've used them as my inspiration for this layout..

autumn colour

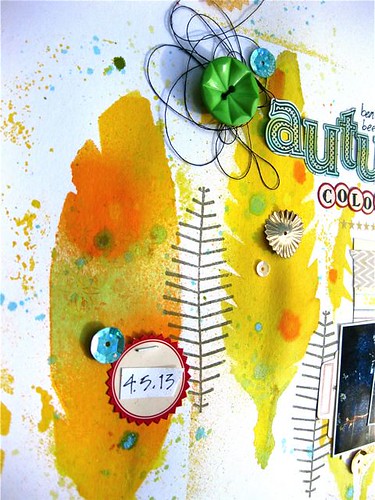
I've used the graphic leaf stencil and lots of bright mists to replicate the leaves in the photo..then stamped in between each leaf with the exclusive graphic feather..

the classic tiny dot alphabet stickers used in the title ink can be coloured easily with ink, and I've used a blue-green combination here..

IMG_0250

adding also a scattering of bright green vintage buttons and sequins including the pot of gold and doily assortment..  Once again I've used a feather as a substitute for a leaf with a cardstock feather 

The border at the bottom of the page is made with layers of paper off-cuts, some stickers and paper tapes

IMG_0230

Thanks for stopping by and don't forget to share your Autumn/Fall layouts in the JBS gallery! xx


Pin It!

Monday, July 29, 2013

Give Me Sunshine

I'm so jealous of you Northern Hemispherians still enjoying your Summer sunshine at the moment. It's Natalie here, and I'm shivering my way through the cold of Winter down in Australia. I could easily do warm weather all year round, I seriously think I'm more suited to the tropics. I'll take any opportunity to escape the cold, so when it comes to family holidays in Winter I'll chose somewhere hot. Every single time.


We recently had a vacation in Queensland which is much closer to the equator and known for it's lovely weather. In fact, it's one of the common phrases here to describe Queensland as "beautiful one day, perfect the next". I'm sure it came from some tourist campaign, but hey... it also makes a catchy title don't you think?!


I used my favourite Modern Mercantile collection for this layout, but mixed in a generous amount of pink to coordinate with my girl's bathing suits. Those butterfly stickers are still ranked amongst my most used supplies. And those gold feather rubons? Perfection.


One of the only good things about colder weather is that it makes the perfect excuse for staying inside and scrapping. So since I was on a roll I couldn't help but make a card with my Modern Mercantile supplies as well.


This time I chose to mix in a touch of red highlights to bring a fresh persepective on the collection. I love how adding in a new colour each time gives it a whole different feel. But there's one thing that will remain a staple to me and that's butterflies. This time I chose to go BIG!


I took one of the classic rubon butterflies and transferred it to acetate. After cutting around it I was able to bend up the wings a bit and give it some dimension whilst still keeping it's translucent quality. You could probably create a similar effect with vellum too, but I appreciate how sturdy this stuff is and I know it won't get ruined if I shove place this in an envelope.

Enjoy your summer! I'm off to turn up the heating. Bbbrrrrrrr.....

Pin It!

Monday, April 8, 2013

JBS and the Play Date Cafe

This week, Jenni Bowlin and the Play Date Cafe have teamed up and it was fun to get to participate and play along with them.  The Play Date Cafe is a fun color palette challenge, which is something I have never done before, and I really enjoyed it.  So much that I actually made two projects.  I just couldn't help myself.

Besides using the Play Date Cafe color challenge, we needed to also use some or one of the new Jenni Bowlin stamps.  Awesome!


I used the stamps for two things.  One, to house my journaling.  And two, for a cool background effect.  I like how the stamped images are layered over the brown and tan dots.  And I feel like my stampping may be improving some!  Yay for that!


I used other JBS embellishments like the buttons and such.  And although there was no green in the color palette, I could not seem to help pulling some in.


I hope you go play along with the Play Date Cafe this week.  There is a cool prize!!

Have a great day!!

~ Corrie
Pin It!

Monday, February 4, 2013

Cards with Feather Tags & Printed Chipboard

Two of the most popular new items debuting at CHA last month were the Feather Tags and Printed Chipboard. Both are fabulous for scrapbookers and cardmakers alike! Today I'm sharing two card projects using these cute new products.

These softly-patterned feather tags add just a bit of dimension to any project and are perfect for layering. They will be available in the vintage patterns I've used on this card, as well as a printed kraft and red pattern.


And one of the most versatile new embellishments are the Printed Chipboard Bingo Numbers :
I can see them being used in Project Life to mark the date, in journaling lists, or as a sweet numerical notation on any page! The Printed Chipboard also comes in these tiny dominos and watch faces:


Our new products are shipping now, so look for them to arrive in your favorite scrapbook store very soon!


Pin It!

Monday, January 21, 2013

Project Life

Hey everyone!  It's Jenni Hufford here today and I am sharing a little bit of Project Life using JBS cut files and products!


Today I am sharing my closing page for 2012.   I am the first to admit-- closing pages STUMP me.  I never quite know what to include.


My Project Life week runs from Monday -- Sunday.  Since December 31 fell on a Monday, I was just planning to include a photo in the prior week's spread.  That's when I had the idea that New Years Eve should be my closing page--- what better way to conclude the year??


I used many pieces from the Red/Black Collection in my spread.  It allowed me to have a Holiday theme without looking too Christmas-y.  I especially loved the clocks in the Red and Black Collection/ Mini Pattern-- the clocks were perfect for my New Years Eve theme!  The paper on the top left pocket is from the Family Tree Paper Pad.


I took so many photos on New Years Eve that I decided to include an insert on my closing page--- yea, i know, who makes an insert on the closing page!???   But that's what I love about Project Life, you can make up the rules as you go.    The JBS Cardstock Feathers were the perfect final touch.  I adhered them on top of my page protector.


I backed my insert simply with pattern paper and adhered the page protector (which is just a 12x12 page protector trimmed to fit my insert) with washi tape.

Thanks so much for joining me today!


Pin It!

Thursday, January 17, 2013

cuts! feathers and stars and more!

Hi everyone! This is Ashley today, and I'm excited to share with you my first-ever pages using JBS cut files!

Having recently received my first die cutting machine for Christmas from my mom -- a Silhouette Cameo -- I was super excited to finally get to use those awesome JBS digital cut files that come out each month! Awesome! I was so excited, in fact, that I just couldn't stop cutting and made three layouts for this months' blog theme. 

For my first page, Any Ducks? No Ducks. I used two different JBS cut files. I used the stars from Backdrops 1 (JBS Mercantile November 2012 kit), and a feather from the January 2013 JBS Mercantile papercrafting kit
For the layout base, I layered the stencil die cut paper over a JBS text paper from my stash. If you don't have this same text paper (I stocked up because they are amongst my FAVES!), you could use a text paper like the b-side of Peeling Paper from Haven.


I cut one of the January JBS kit feathers from bright yellow cardstock, and then covered it with confetti collected from my JBS paper scraps. This was a fun and easy way to dress up a plain cut!

I layered an overlapping row of stars from the Backdrops star file across the top of the layout. 

Supplies: stencil die cut paper; feather cut file; backdrops1 star cut file; General Store postage stickers; shadow alpha stickers vintage/black; Fiskars/Jenni Bowlin Blue Ribbon Large Squeeze Punch; true vintage buttons; chevron mask.
 For my next page below, happy little lunch eater, I layered two pieces of cut cardstock over a patterned paper background. The top aqua cardstock has many sizes of different feather styles cut from the files included in the JBS Mercantile January 2013 Papercrafting kit. This cardstock was actually the first thing I attempted to cut with my brand new Cameo, and I loved the way it looked even though I had originally intended on using the feathers I cut out, I used this piece instead. Under the cut-feather cardstock is a sheet of white cardstock cut with the triangle pattern included in Backdrops1
I layered the two cut cardstocks over the backside of Typing Lessons paper from the Wren collection.


This combination of layered cut paper happened quite by accident. I was cleaning up a mess of papers, trying to make room on my desk so I could actually DO something, and I stacked the cut-feather cardstock over the triangle-cut cardstock and placed on the huge stack of JBS papers I keep on my desk at the ready. It was LOVE IT at first sight. The rest of the page just fell into place once I saw those papers layered up.

In keeping with the blue/green base I had built with the cardstock and patterned paper background, I gathered together a bunch of favourite JBS products in blue. I used a chipboard file tab covered with a blue cardstock file tab Hodge Podge sticker; a blue Hear Ye Hear Ye banner, a blue star from an apothecary label sheet, and a chipboar star covered with chevron patterned paper. The rhinestone star added a nice little shiny touch to this embellishment cluster. I sanded, scratched, and scuffed up the round number stickers for the date.


My third page, Lines First, again uses cut files in two different ways. I again used the feather cuts from the JBS Mercantile January 2013 Papercrafting kit (seriously, I love feathers), but this time covered the feather in chunky silver glitter. I also made my own mask by using a left over portion of the Backdrops1 triangle cut used in the page above, but I layered it over the centre of the patterned paper and covered over the rest of the page and misted away in a light teal colour ink. And now I have teal coloured triangles to use on another page another time. :)

I started building the page on a piece of die cut label paper from the JBS Family Tree line. I love being able to use older papers from my stash! While I always scramble to buy the latest and greatest JBS products, I do also love how truly timeless they are! And I am really regretting that this is the last piece of this paper I owned! I added in a die cut label from the polka dot journalling card pad. I also added in a little strip of die cut and perforated stamp paper to host the title. 

This is a fun and easy way to make your own glittered cuts! Just cut out the desired shape, then coat liberally with Mod Podge, and dunk into your favourite glitter. I paired the glittered feather cut with a JBS cardstock feather embellishment, and topped both off with little bows. The star on the house was an extra that didn't make it onto the Any Ducks? No Ducks. page above, cut from the Backdrops1 star pattern.

Here is a closer look at the masked and misted triangles. Love the possibilities of being able to cut my own masks now! 


-- Ashley.
Pin It!