Friday, November 30, 2012

December Daily by Karine Cazineve-Tapie

Today we have a bit more December Daily inspiration for you as tomorrow is December 1st!  Hooray!  This one is from Karine and has a delightful Candyland appeal to it due to her masterful use of mists on the resist pages from the November Mini-Album Kit.  I truly have visions of sugarplums dancing in my head when I look at these sweet pages!


Pin It!

Thursday, November 29, 2012

Christmas Joy Circa 1972 from Dina Wakley

Today we have two charming and creative Christmas layouts from Dina Wakley.


For "Joy," I wanted to scatter elements to echo the scattered mess under the tree on Christmas morning. The picture is me and my sister in 1972. On the left of the layout I wrote some of my earliest Christmas memories.

Supplies - Christmas 2012 Calendar Paper, Diecut and Perforated Papers - Label Sheet, Printed Tags - Kraft Flag, Skinny Alpha Stickers - Black, Printed Tags - Vintage Flag, NEW Multi-colored label stickers (available at JBS Mercantile on 12/1!).

I loved this Big Wheel! I rode it until the plastic wheels were completely broken and worn through. I thought the Santa paper was perfect as an accent, since this was my big Santa gift that year.

Supplies: Christmas 2012 Paper - Jolly St. Nick, Skinny Alpha Stickers - Red, Printed Tags - Kraft Flag
Pin It!

Tuesday, November 27, 2012

Ho, Ho, Ho, and a little Merry!

Hi everybody!  Tina here today with my first Jenni Bowlin Studio’s project and post!  I am so excited to be able to share this with you today and I hope you enjoy it!

Can you believe Christmas is less than a month away?  It really doesn’t seem possible at all.  It just seems like yesterday I was wearing sandals and shorts.  But, since December and Christmas are SO close, I thought it would be fun to create a little holiday home décor project for you.

One of my favorite crafty pastimes is creating fast and simple home decorations with my scrappy supplies.

When I create home decorations, I like to start with a simple frame that can be embellished to adjust to the season. I embellished my frame by adhering several strips of washi tape around the edges.  Isn’t that a super quick and great look?


I removed the glass from the frame and ‘backed’ my wall art with paper from the Christmas 2012 collection. I then cut a section from the Assessory Sheet, inked the edges and adhered with foam strips.  Adding a little dimension with pop dots or foam squares adds a big impact with such a small detail.


I filled 3 medicine vials with glitter and tied them together with twine.


I added a star sticker(s), star rhinestone, and stick pin to complete the holiday look.  This project seriously took no more than 30 minutes to complete.  Perfect for the busy holiday season.


Supply List:
Paper: 

Other:

Thank you for letting me share my Merry Christmas frame with you today.  Have a great week!
Pin It!

Monday, November 26, 2012

Digi Monday - and a Month Long Sale!


Let's talk about Holiday Sales!   Everything - yes everything - at JessicaSprague.com - is 40% off until December 31st.  That means our entire JBS Digi Shoppe is 40% off!  Visit our shoppe and have Jenni's fresh vintage designs on file for all your digi and hybrid projects!

We have two new kits releasing today:


These are just perfect for the holiday season!  I put the new kits together with my favorite JBS digital Christmas patterned paper and some messy digi stitching to create this layout.


Supplies:
Vintage Christmas
Christmas Bingo Card Kit
Vintage Bling
School Days Alphabets and Numbers
Frame Rub-On Kit
Jen Martakis ribbon
stitches by Cilenia Curtis

and Miki Kreuger created this magical Christmas layout:


Supplies:
Vintage Christmas
Vintage Bling
Vintage Cream and Black


Just beautiful Miki!


Don't forget about our JBS Digital Designs Creative Team Call, too!  Read all about it here:


Have a great day!


Pin It!

The Perfect Christmas?

Hey everyone!  It's Jenni Hufford here and I am so happy to be sharing a Christmas Memories layout with you today!!


Last Christmas one of my favorite memories was watching my children and their cousins bake Christmas cookies.  It was a few days before Christmas and we decided to get together spontaneously to bake and decorate Christmas cookies.  If you are anything like me, those last few days before Christmas are sheer CHAOS.  That is about the time that perfectionism begins to creep into my heart and I become overly concerned and focused on "creating the perfect Christmas" for my family.


The older I get, the more I begin realize there is no "perfect" Christmas!!  This afternoon while the kids baked Christmas cookies was the perfect reminder to me.  As they were loading a mountain of red hots, peppermints, icing, candy canes on their cookies, I realized they were not worried about making "perfect" cookies, instead, they were just enjoying the process and the fact that they were together.  I need to be more like that and refocus on the true meaning of Christmas.


In order to create this layout, I started with Jenni Bowlin's Perf Marks Clear Stamp to create a grid on white card stock.  I then added the bottom tags from the Christmas 2012 accessory sheet with two wallet sized photos.  I then added bits and pieces of Jenni Bowlin accessories, and square punched pattern paper inside the grid.

Thanks so much for joining me today!
 
Pin It!

Sunday, November 25, 2012

A Happy Xmas by Harumi Hagiwara

Hi everyone! Harumi here!
I have made a Christmas layout with the most recent JBS Christmas Collection.


I love the Green Chevron paper from the new JBS line, Vintage Christmas 2012!  It is sooo cute! I used it as the base of this layout.  I cut out the simple shapes of trees onto a piece of Bank Statement Paper in Kraft and layered it on the green chevron paper.

I then decorated my page with little ornaments cut from the Accessory Sheet. I enjoyed making very much!  Happy holiday crafting!  - Harumi

Supply List:
Pin It!

Friday, November 23, 2012

Coca-Cola Santa Memories

Hey everyone!! Corrie here today with one of my Christmas memories!

Now that Thanksgiving has happened, my attention has turned to really focusing on Christmas.  The radio has been fixed to 24-7 Christmas music, the inside of the house is getting decorated, and with much groaning from my hubby, the outdoor lights are ready too.  I love Christmas time.

As my sisters and I have gotten older and had families of our own, my mom has shared some of the decorations we grew up with.  It is cool to have stuff up that I always remember being there.  One of the coolest Christmas decorations we had was a stuffed Coca-Cola Santa.  I did not realize how old he actually was until I pulled out this picture, which was dated 1977.  I was not yet 2 years old.


So the Santa is at least as old as me.  Crazy.  Back in 1977 he was holding a small bottle of Coca-Cola too.  That has been lost for years now.


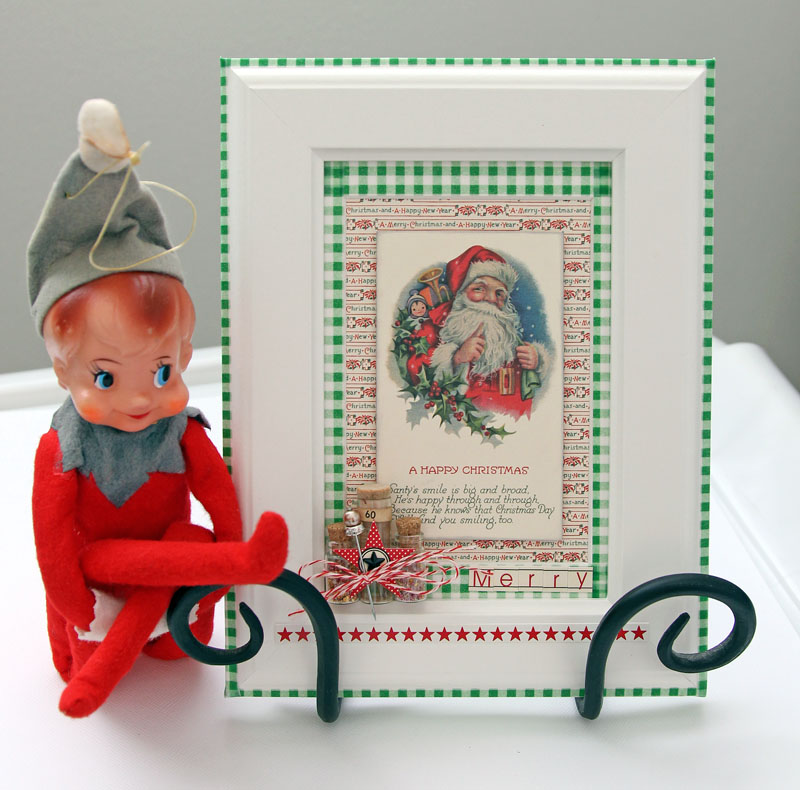
I used the new Jenni Bowlin Christmas paper, some of her awesome vintage buttons, the bling stars, skinny alphas, and the quilting chipboard pieces along with a little Seed Packet paint dabber.  


And the Santa on this card I cut out of one of the sheets of paper totally reminds me of my Coca-Cola Santa.

So, I must admit, I love this Santa very much, but I do not have him.  I am not really sure how my sister ended up with him, but she did.  I only see him in the pictures she send of her kids with him now.  At least he is still being loved on because he really is very cool.

Have some very Happy Holidays all!!

~ Corrie
Pin It!

Thursday, November 22, 2012

It's the Most Wonderful Time of the Year

Hi JBS fans! It's Natalie here today sharing some of my Christmas Memories.

I don't know about you but I've been truly inspired by all the Christmas craft projects that the DT and Ambassadors have been bringing you over the past few weeks. So many fabulous ideas for cards and tags and gifts and home deco! If you've missed any of it then it's definitely worth your while scrolling back through.

But for the coming week we're going to turn our attention back to our more traditional craft form... the layout ;-)


There's something magical about watching the joy on my daughter's faces as they open their presents on Christmas morning, and I was so happy to be able to capture this moment. But because they're still dressed in their (blue and purple) pajamas in the photo I wanted to balance that out in the colours I chose to scrap with. So along with the traditional green and red I included some grey and blue too. I've decided I quite like the combination!


I used a mixture of non-Christmas products (like the Bank Statement paper I used as my base, and the Printed Pocket I hid my journaling in) along with some of the new Christmas collection (like my favourite Christmas Ribbon paper). And personally I believe no Christmas layout is complete without a touch of sparkle so I covered some chipboard stars with silver glass glitter and scattered them across my page as my embellishments.


After Christmas I generally move on, so I've got all of my photos from last year still to scrap. What about you, what Christmas Memories have you got to scrap about?

Pin It!

Tuesday, November 20, 2012

Christmas Cards with Red/Black Extension V

If you're looking for a stylish design for vintage inspired Christmas cards this year, look no further.  This charming set by Amanda Jones Robinson is vintage perfection and easy to replicate.

Amanda used a Mini Papers sheet from Red/Black Extension V to create a set of nine cards.  First she cut a simple star in the center of each mini paper with her Silhouette Cameo (you could trace a star shape and cut it out with an Exacto Knife as well).  

She then layered a Mini Paper over  scraps of vintage ledger and sheet music and placed a contrasting cut star on top (the ones she cut from the Mini Paper).

Each card is then garnished with Chipboard Stars, Rhinestone Stars, Stick Pins, and a bit of German Foil.

 The sentiment is printed onto cardstock, trimmed out, edged with Malted Milk Ink, and adhered on a piece torn off the Die-Cut Perforated Label Sheet.

 Finally, each is sweetly hand-tied with a bit of Baker's Twine and they are ready to be sent off with Christmas greetings to friends and family near and far.

Pin It!

Monday, November 19, 2012

Junque Journals for Christmas

I love mass producing crafts for the holidays. This year, I'm making "junque journals" to give as hostess gifts or to top gift packages.

These are easy to create assembly line style and one sheet of Vintage Christmas 2011 Mini Patterned Sheet will make three journals.

A row of 3 squares of the Mini Patterned Sheet will serve as the journal cover and base. Here is the method I used to assemble these. You can make many journals at one time this way.

1. Create your "junque" pages by cutting up a bunch of old paper you may have around: ledger paper, graph paper, and notebook paper to a size of 3.75 inches square. Punch 2 holes in the top of the paper and place long gold brads in them. Punching through a lot of paper at once is easy with a Cropadile Model II.


2. Cut the Mini Patterned Paper sheet so you have three blocks across and score in-between each block.


3. Adhere the packet of note paper onto a square of chipboard 3.75 inches square with a strong glue (Alene's Tacky Glue for example) and glue this onto the inside of the middle square.

4. Cut about 1/4 inch off the right side of the patterned paper so it will fold over the pack of paper nicely when closed.

5. Decorate the front cover by stamping the Cabbage Flower stamp on off-white cardstock in gold and Stick Candy paint. Cut them out and score each in half. Glue the front half of the image to the front cover and further decorate with German foil and JBS Vintage Sew-on buttons and buttons from your stash. Fold over the Cabbage Flower image and adhere on the inside just along the bottom to make a small pocket and to cover any stitches that may show.

 
6. Cut the December calendars from the Christmas 2012 Calendar Sheet. Mat them onto gold paper and adhere to the inside back cover of the journal.


7. Tie a ribbon around the button on the front, wrap around the journal, and wind around the button again to hold closed.


Pin It!