Showing posts with label fiskars. Show all posts

Wednesday, June 12, 2013

JBS & Fiskars : Perfect Combo for this Mini


I'd like to show you the process I used to create one of my favorite types of mini books.  If you use a selection of Jenni Bowlin clear stamps with the Fiskars Easy Stamp Press, you can create unique book after unique book with these supplies and the "origami poem" folding method.

The book is based on folding a piece of paper to make an 8 page mini book.  You can see the instructions for folding this little album at Origami Poems Project at this link.  You can also see how I used the same folding technique to make a mini from a 12 x 12 sheet of paper here.

Here we go!

At winter CHA, Jenni released a great collection of book style clear stamps. 

which coordinated with the Composition Book clear stamp from a previous release:


Other stamps that are approximately the same size can work also:


The various stamps are arranged on the Fiskars Easy Stamp Press to create the mini album and can be rearranged, mixed and matched to make different albums each time.

Easy Stamp Press


1.  Arrange the stamps on the Press in the configuration shown below.
(I arranged my stamps as shown a little different than in the linked video - there are a couple of different ways to arrange - you just need to fold so the cover is in the front)  
Note that one side of the Stamp Press needs to have stamps arranged upside down.


2.  Ink your eight stamps.  You can ink them all the same color or ink them different colors.  A tiny edge of 2 of the stamps on the edge will hang over the press.  You will just need to make sure you ink and press these edges.


3.  Turn the press over and place it over the paper you want your mini to be stamped on and simply press down on the station.  Make sure to press the stamp edges that are hanging slightly over the press.


4.  You can rearrange and change up the stamps on the press to create different combinations for the mini books.

5.  Cut out your stamped image making sure to cut even margins all the way around.

6.  Score and fold in between each stamp to create folds as in the Origami Poems video.  Make one cut to the mini also as shown (cut is on the red line).


8.  You can now embellish your stamped image as you wish.
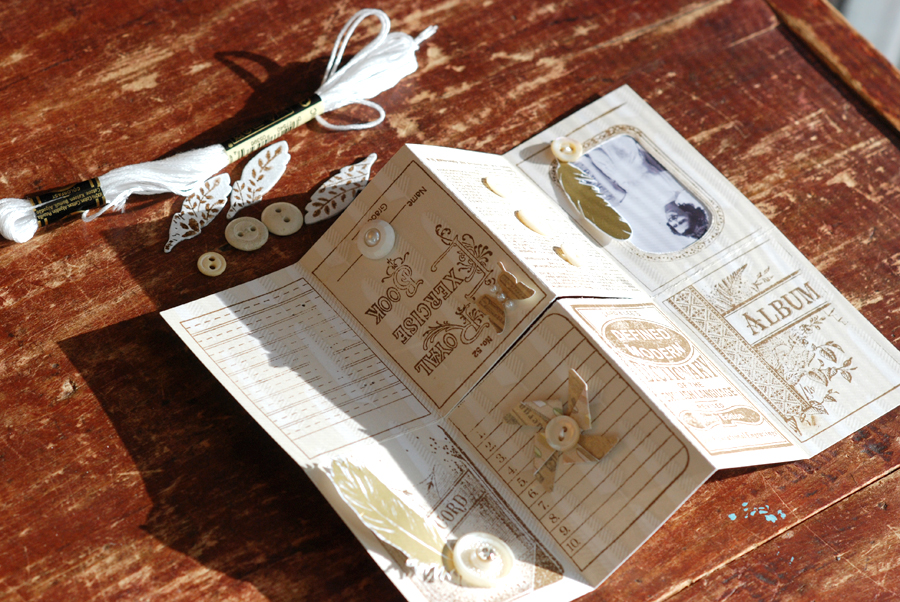


I made a mini album using a photo of my grandmother and some of my favorite white buttons that belonged to her. I used punches, rub-ons, chipboard, and bling to embellish.


Supplies:


Pin It!

Thursday, June 6, 2013

More Jenni Bowlin and Fiskars!

I am loving all the inspiration with the team up of Jenni Bowlin and Fiskars!  So much awesome-ness.  Today, I am going to show you a little fun with Jenni Bowlin stamps and the Fiskars Easy Stamp Press.  I think I am a not such a good stamper, but this thing made it way more fun to play with stamps.

Okay, I pulled out 9 different stamps so I could make a grid background for my page.  And I used the stamp press to line it up.  I just eyeballed it, but still each image stamped more straight than ever before.


No measuring.  Just kept on going.


I am so excited about this!

Here is my page finished.


I love the grid and the custom made background.  And all the new Jenni Bowlin goodies like the flatbacks and the feather tags.  Well, and the rub on letters are incredible.


That's all!  I hope you enjoyed my stamping adventure!  Come back tomorrow for more inspiration!

~ Corrie
Pin It!

Tuesday, June 4, 2013

Fiskars + JBS Mercantile

This month we are excited to be teaming up with Fiskars! We'll be highlighting some of their cool tools on the blog and showing you how they work with our Mercantile kits.

I am personally enamored with the Fiskars Easy Stamp Press. This handy tool is simple to use and for messy, clumsy stampers like myself it is a must-have! I used it to apply this month's kit stamp - the wonderful ink splatters - on this layout:


Using the station is simple - just apply your acrylic stamp to the underside of the block and ink it up.

Then flip the block over, line the stamp up where you want it to go, and press down to stamp the image. The orange sponge corners compress and allow you to imprint the stamp exactly where you want it!


It's so easy and precise and I know this tool is going to make me a better (and more frequent!) stamper.  It takes the guesswork out of stamping and makes it practically foolproof.


Doesn't that stamped image really look like ink droplets?! And without all the mess of the real thing!

I also received some of the fabulous Interchangeable Border Punches from Fiskars, with interchangeable, space-saving cartridges that easily pop into the base:

I used The Stars Aligned punch to add a detailed border to this layout, which also used the new Historian add-on that's perfect for Project Life:


These punches create clean, detailed borders in no time flat. And the remaining negative shapes  make perfect confetti for sprinkling about your page:


Thanks so much to Fiskars for letting us play with these fabulous tools! And be sure and check back here often to see more fun projects and tutorials from the design team!


Pin It!

Sunday, April 21, 2013

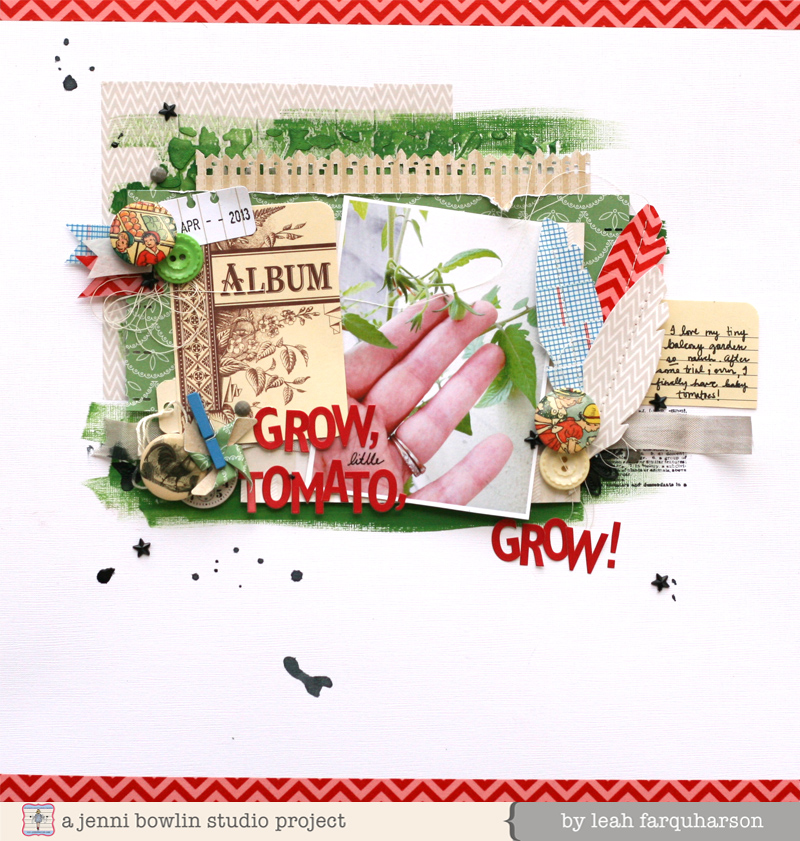
washi layers, banners, and feathers

Happy Sunday all! checking in with some more ideas for using the brand new washi tapes that Jenni recently released! I decided that when I started this project I wanted to focus on how versatile washi is - and I think I accomplished my goal.

I started by layering this tape as an anchor or base for my design. And this one along the edges to give it a pop of color. I combined one more into the mix to create the washi banner pieces.


I used a number of the lovely Jenni Bowlin fiskars punches in different places throughout this layout, too.

My last use of the washi tape comes in the form of these feathers - I laid a bunch of the tapes down on a piece of cardstock and cut feathers using one of the exclusive silhouette cuts from a JBS Mercantile kit.

I hope I've given you a few ideas to spark your creativity this weekend!

~ Leah

Pin It!

Tuesday, March 26, 2013

The Pinwheel punch

Hi everyone! Harumi here!
I want to share with you a layout I did using the pinwheel punch and the feather gold rub-ons.


I love the Modern Mercantile papers! I chose Miscellany as the yellow stripes and gold flowers are very lovely! The gold feathers and flowers match so well and are so gorgeous!


I used the Etcetera paper for the pinwheels and circles. I am enjoying working with the many patterns of the Modern Mercantile line.

Happy Creating!

Pin It!

Thursday, March 21, 2013

Fiskars and Jenni's Label~

Hi everyone, I wanted to share with you a layout I did using some of the awesome, new products released at CHAW 2013.  The paper is Vintage Modern. Gorgeous, rich paper colors are  so easy to work with.  Other products used were the new Rub-Ons (Canning Jar fun, Feathers ~gold and black). They applied so easily and look great!!

The two Fiskars punches used were Jenni's Label ( she has her own punch named after her:) and Quilt Star.  Just FYI~ many of the digital kits have punchables images.  Just another reason to have all the punches!
*************************************
Calvinball is going on in the forum~stop in and check it out!  Prizes and fun promised!
Pin It!

Thursday, March 29, 2012

Briana Makes the Jester Punch Shine!

Today we have a delightful CHA Winter layout from Briana Johnson.  This one really makes the new fiskars punches shine!  The bottom is a rainbow created with the Jester Border Punch and the top is a cloud filled sky created with the Grandma's Doily Punch paired with a simple scalloped circle punch.  Add a couple tags made stickers off the Hodgepodge sheet and sweet!

And how clever is this?  Briana kept the negative bits from punching the layout and made this thank you card with the creative banners.  Clever!  Pair it with the new Dictionary Stamp for a quick and easy card made from scraps.  Thanks for the inspiration Briana!

Pin It!