Showing posts with label shimelle. Show all posts

Tuesday, April 16, 2013

Scrapbooking with Washi Tape- The Golidlocks Technique


I am delighted that Jenni has added washi tape to her line of scrapbooking products, and of course her tapes are patterned with classic designs that will mix and match with ease.  I wouldn't expect anything less!  But this is extra brilliant considering a roll of washi tape - even used frequently - can last a long while.  All of the JBS tapes are great designs for that long-term use, and you'll never have to worry that they will go out of style.


If you're starting to collect washi more than you use it, try a trick for letting it help you embellish a page design.  Pick two tapes that work together for your page, and use three strips of each: one long, one short, and one in between.  Perhaps we should call this the Goldilocks Washi Technique!


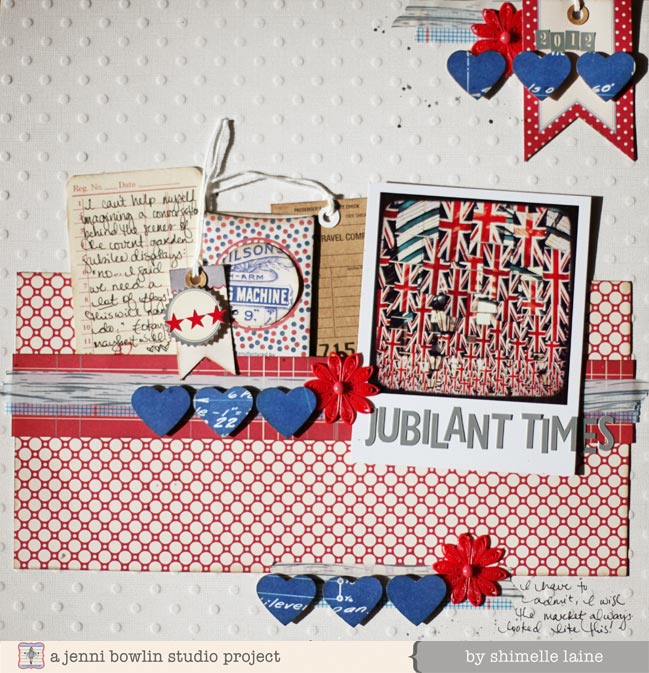
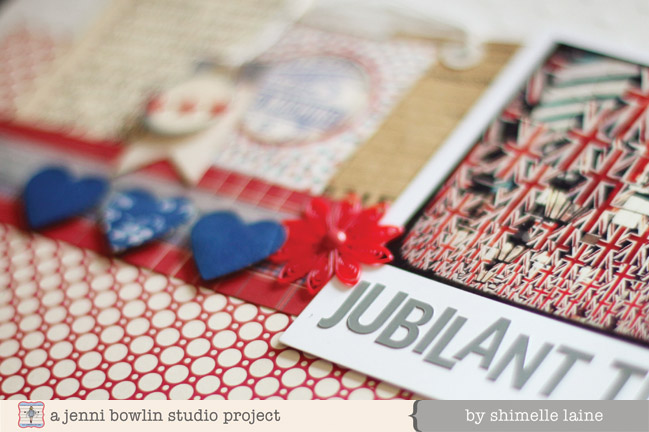
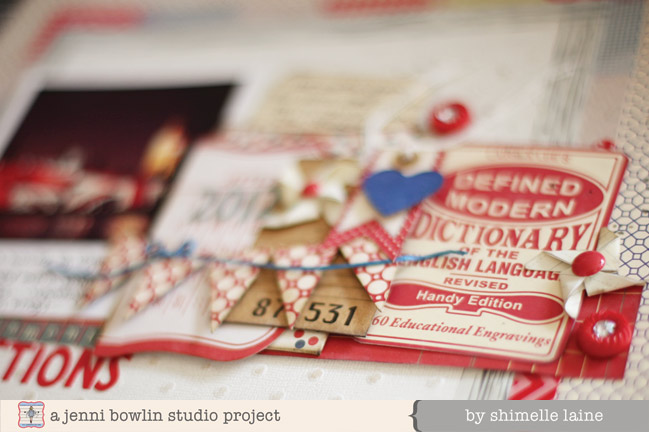
Placing these three pairs of tapes on your layout then makes it easy to embellish things for a design that will always work.  I used the blue grid and whitewashed woodgrain tapes, and my smallest set is up at the top right corner, the longest across the middle of the page, and the middle set at the bottom.  Then it's just a case of choosing some embellishments you can repeat in those three locations, so I used a heart punch with the lovely blueprint paper from the Wren collection and a red doily.  Placing those three groups of embellishments and my photo first made it easy to finish the rest of the page because the placement was obvious: all that space to the left of the photo!  So that became a great place for journaling and some tags.  Of course, for a multi-photo page, you could easily replace some of the tags with additional pictures.  By keeping the three sets of tapes all on the horizontal and using them to anchor those repeated embellishments, the rest of the page comes together without worry.  Give it a try!


If you fancy more inspiration for your JBS washi tapes (and more red, white, and blue JBS goodness!), I have another project to share with you on my blog.  You can find this project here, designed as the facing page in my album.  These two pages aren't a double page spread in the strictest sense, but they have enough in common to certainly coordinate side by side.  


Pin It!

Friday, April 13, 2012

Learning from Dina Wakley


Earlier this week fellow JBS designer Dina Wakley and I were guests on a new episode of the Paperclipping Roundtable, a scrapbooking podcast.  You can just click below to listen to us discuss our process for creating a single layout from start to finish, and find this episode here on the Paperclipping website if you want to join in the comments.


Listening to Dina talk about her process made me immediately want to give some of her creative steps a try - and I wanted to try a page that mixed Dina's free-flow, artsy style with my own look, so things like stacked papers, butterflies and letter stickers.  I started with the die-cut letter stencil, after I had used it to paint letters onto a few other sheets of cardstock, so it was already soaked in pink and purple ink.  I layered that and the music print from Haven on the large dot embossed cardstock in Jenni's collection for Co'ordinations, and I was off to a start of embracing my messier side!


To try a few other things I might not do, I grabbed my favourite JBS stamp (the butterfly, of course!) and 'inked' it with a colour wash spray instead of an ink pad, and stamped it on one of the mini-pattern blocks from Red/Black Extension IV.  I love how it stamped clear enough that you can see the butterfly design, but fluid enough that it looks more like paint than a stamp.  Then I cleaned and reinked the stamp with Jenni's lavender ink pad and stamped just offset from the first design... then soaked the whole block with pearl glimmer mist for good measure!  I love the mix of shades and the shine.

This photo itself deserves a little explanation, I suppose.  It turns out I was a scrapbooker long before I knew the word scrapbooking existed.  Growing up, I was a 4-H Member (4-H! For Youth! For America! 4-H! ...I know some of you were singing that already.) and we had to keep an official 4-H record book that we turned in for assessment every year.  In it, we had to record - in our own words - what we did on any number of special projects we had highlighted as our interests.  My family have been helping me search for some childhood photos and came up with this book that includes page after page of things I wrote growing up about all my hobbies and interests, and the writing is just as funny as the pictures.  I was so overly serious as a child!  Plus although my vocabulary has matured a bit over the years, there are sentence structures I used as a tiny girl that I still use now... clearly I am a creature of habit!  So I decided to include the whole page and printed the scanned image as a 4x6 picture, which is clear enough to read easily in my album.

Behind the photo, I layered scraps of JBS papers new and old (and one extra scrap from some other project left-overs since it was a good match to the purple) and tucked in a label from the Magpie accessory sheet and some hodge podge stickers (love them!) and sprayed some pale pink mist over that whole stack of things to make it coordinate better with the alpha stencil.

To finish things, I embossed the JBS chipboard hearts with a metallic pink embossing powder - it looks either pink or purple, depending on how you look at it, so that pulled the pink and purple colours together even more.  I wanted a bit of contrast behind the hearts so added a few scraps of pink washi tape, then spelled out my title with JBS letters new and old - the tiny letters are from the bottom of the hodge podge sticker sheet!

Dina... I hope you approve of my style mash-up!


By the way, all this weekend I'm hosting an online crop on my blog - and there you can see what happened to the other piece of paper from that alphabet stencil, amongst plenty of other things! And win prizes, including JBS goodies!  I'd love for you to stop by for some scrapping fun.

Have a brilliantly crafty weekend!

Love and glitter,
Shimelle
Pin It!

Sunday, January 29, 2012

JBS at CHA!

Want to see Jenni's booth at CHA?  Head on over to Shimelle's Blog for a lovely glimpse.  :)
Pin It!

Thursday, January 19, 2012

Valentine Envelopes by Shimelle

I may have gotten a bit carried away dressing up some envelopes for Valentines for some friends, but there are so many pretty red embellishments from JBS that it seems a shame to hide them all away!

I stamped the envelopes with the butterfly in white ink, then started layering up the embossed tag.  The bottom layers are netting and red ribbon, then all sorts of JBS embellishments.  A scallop circle from red floral paper, a smaller tag stamped with the receipt design, label and flag stickers, butterflies in sticker and paper + gem formats, red doilies and a rhinestone button.  A letter sticker monogram labels each of the envelopes too.

So obviously not the sort of envelopes that will make it anywhere in the mail, but perfect for a hand-delivered valentine, especially if it's for a crafty girl who might take it apart and add that tag to a scrapbook page!

Happy crafting!

Love and glitter,


Pin It!

Wednesday, December 7, 2011

Christmas Cards by Shimelle


There is still plenty of time to make some Christmas cards - or so I'm telling myself as I haven't made nearly enough yet! But good news: today you can make three cards in a flash, with your JBS stash!


Gather a mix of materials: I used the accessory and mini paper sheets from the Vintage Holidays collection, plus label stickers, buttons, star stickers and doily flowers. (I started with the big bingo cards too but didn't use them in the end.) You'll also need some card blanks.


You may also want some numbers or letters at the end. I just used numbers and mixed and matched various sizes and colours.


Start by selecting one 4x4 mini pattern and one large accent card for each card you will make. I inked all the edges with brown ink.


Arrange the paper and accent card side by side to create a landscape card and adhere to the background. You may want to trim a bit from the sides of the card so it will still fit in the envelope after more bulky layers are added.

Then assemble a group of small embellishments for each card. I cut the Season's Greetings sentiment from a border on the accessory sheet, then added a rectangle and circle label, a doily and a button to start, but this design will work with any collection of small embellishments you have to hand.


All those little things get layered onto a plain tag to dress up the card. I covered each tag with a layer of green tulle netting to soften the look, or you could add ribbon or fabric scraps. Then layer the embellishments, scraps of paper and number stickers until you're happy with the amount of embellishment and adhere the tag to the background when everything is secure.


By the placement of the embellishments, choice of papers and the mix of stickers, each card will look unique, but they all come together quickly by following the same process. For this day on the calendar, I think that's a win!


Have a very merry Christmas!

Love and glitter,


PS: If you're feeling extra-Christmassy (or wish you were!) it's never too late to join me for some Christmas scrapbooking with Journal your Christmas!
Pin It!

Wednesday, November 9, 2011

Christmas Garland #5 by Shimelle Laine


All this month, the JBS design team are working on a collaborative project - a Christmas garland made with all sorts of Jenni Bowlin product!  I started my contribution with one piece from the large chipboard banner set, then layered two rub-ons over the top.  First the silver receipt, then the photo design in green (that colour is a members' exclusive, and I love the fresh, spring green mixed with Christmas tones).

At the top, double-sided tape was my friend.  I used it first to adhere a length of ribbon to the chipboard, then ran another length of tape to cover in sparkly green glitter.  You can't make Christmas decorations without glitter!  It's the law.

I stamped Jenni's new alphabet (in the store soon) with black Staz-on ink and replaced the dot on the j with the star stamp in the set.  I added just a tiny bit of colouring inside the letters with a pale green marker.  And then finished everything with two red butterfly stickers and the plain chipboard butterflies to give them some extra dimension.

Join us all month long for little bits of Christmas wonder with Jenni Bowlin Studio!

Love & glitter,
Shimelle

PS: Join me this weekend for three days of Christmas crafting fun with tutorials, Christmas journal preparation and more, including some special JBS projects, of course.  It starts on Friday and it's completely free - just stop by shimelle.com!
Pin It!

Wednesday, October 12, 2011

Shimelle Laine inspired by Jenni Bowlin

This month the design team is getting inspired by Jenni Bowlin! Here is Shimelle Laine's lovely contribution.
Take inspiration from Miss Jenni herself? That literally flooded my mind with ideas - I love Jenni's creative vintage style. But I knew pretty quickly I specifically wanted to take inspiration from something older, because I loved Jenni's pages from the moment they started to appear in magazines and such... and one thing I respect about Jenni so much is how her pages are timeless. The pages she created several years ago are just as beautiful now and have dated from trends and fashion.

I decided to take my inspiration from the second layout in this post: jennibowlin.blogspot.com/2006/06/june-gallery-and-other-s...because it illustrates something I've always loved about Jenni's style - how she plays with proportion and space to create pages with something unexpected but not overwhelming. I loved the large photo, the staples, the addition of little things right on top of the image. So I started with those ideas and away I went. A layout of my own with a big photo stapled to the background, stars and butterflies and writing right on top of the picture. I love how it looks in my album - it's a great change of pace but by picking my favourite motifs, it stays true to my style and fits the flow of all the pages in the book.
All supplies by JBS aside from kraft cardstock (American Crafts).Alterable Alphas - ledgerMemo book - orange (star sticker)Apothecary stickers - red (star border, star sticker)Border cardstock sticker - red (pinked border)Butterfly Banner stickers - yellowMini Chalkboard Alpha stickers - blackDotted label stickers - red and blackname/date stamp
Pin It!

Monday, October 3, 2011

Spawn of True Scrap

Hello Monday! Today I wanted to give all you Jenni Bowlin fans an exclusive sneak peek into my class at Spawn of True Scrap.  It's called Going Off the Grid and features lots of unique and innovative ways to take grid design to the next level.  And there's plenty of fantastic JBS products involved - including this fun page featuring a grid made of circles:


JBS design team member Shimelle Lain is also an instructor at this exciting event. Her class, Go With the Flow, is all about creating flow in your albums.

You can check out the event details at the True Scrap site - hope to see you there!


Pin It!

Tuesday, September 6, 2011

Little Miss Charlie by Shimelle Laine

A new month brings a new focus on the JBS Inspiration blog. For September, our designers will be sharing their favorite new and classic JBS products and inspiring us to mix them creatively. First up is Shimelle Laine who writes, "The way newer collections coordinate and breathe life into the existing product range is one of the very reasons I love Jenni's products so! No one does lovely red papers like JBS, and there's always something new to make them mix and match with ease. The black polka dot paper here is one of the new cardstock weight papers from Haven, making it perfect for a background, while the other patterned papers are the older lighter weight that makes them great for layering and dying with walnut ink. I love the simplicity of the silhouette stamped on a tag. Beautiful silhouettes are a real JBS signature, and I love how they are always so clean they can be mixed and matched, like the little girl and the butterflies, both on the same page."

"Little Miss Charlie is actually a toddler now! But she was still teeny when I snapped this picture while catching up with her mum, one of my oldest friends from school. Seeing them both was a special treat indeed."


Thanks for the inspiration Shimelle!


If you would like to spend more time with Shimelle and her creative talent, check out her latest class, Learn Something New Every Day. We think you'll love it. :)


Supplies:

Black polka dot is the back of the accents sheet from Haven, then lots of papers from the Red/Black collections. Sheet from the red memo book. Large and mini chipboard butterflies (painted with JBS paint dabbers in Fountain Pen and Malted Milk). Also, Chalkboard letter stickers, Adhesive pearl flowers, Whimsy silhouette stamp, and Flag banner stickers (red/black)
Pin It!

Friday, August 19, 2011

Back to School with Shimelle Laine

Today we have a charming retro page from Shimelle Laine featuring an exceedingly clever and whimsical use of the Be Our Guest "Home Sweet Home" patterned paper. (and after you peruse this page, if you would like to see more of Shimelle's scraptastic work with JBS head on over to her blog for another page complete with video tutorial and giveaway - giveaway ends 8/21 at midnight UK time!).

Shimelle writes, "I love living in a big city and the great London area has a population between 7 and 10 million, depending on where you draw the lines in suburbia. But there was no difficulty drawing the line in the small town where I grew up, and every morning the school bus passed the 'Welcome to...' sign with the population labelled as 2002 for many years... something I remember because we use to debate which two residents would be the 2 in 2002! So in such a small town, I went to a very small school. Everyone there knew everyone else, and although the town has since grown, everyone who lived there during my school years can tell you all about the teachers, the students and the four-page local newspaper. This photo is so very unattractive but it makes me laugh and remember the days in this particular class - 7th grade science. The girl to the right may kill me for scrapbooking this image as she's a scrapbooker too! But we sat at the same table for science and according to my wobbly script on the back of the photo, I was trying to convince my classmates not to use a flash on the camera, lest we get in trouble with Mr. Vopat. Also, I had just *part* of my hair permed. Serious dawn-of-the-nineties-mall-hair. I have to laugh otherwise I'll cry!"

And here is a little background information about her process, "I had been a bit stumped with the house print on this paper from the Be our Guest collection at first until I looked at it as a school house rather than just a country house. My elementary school wasn't much bigger than that! I hoped to scrapbook something about that, but neither my shoebox of old pictures nor the internet was very helpful with that! So this photo was the next best option and I love how you can see the look of a standard classroom from the simple background in the picture.


The blue ledger paper is one of my favourites from JBS ever - I use it all the time and it works so well as a background. I think I have made four layouts with this page as the background and they all look very different, so it's definitely versatile. To dress it up, I added a frame of malted milk paint and three layered embellishments, each with a a label, a punched circle and a star. I had tried to include the years of my middle school (5th to 8th grade) in the punched circles but the 5 ended up off the page. Close enough, I suppose! I love finding funny little ways for numbers or letters to have significance when selectively cut from a patterned paper."

Supplies:


Be Our Guest papers (blue ledger, house scene - it works as a school house, right?)

Haven labels (from the accent sheet)

Red/Black ruler paper

Mini chalkboard letter stickers

Large letter stickers in two colours (red/black and red/white)

Red star stickers

Blue adhesive pearls

JB for Ranger paint dabber (painted on with a brush) in malted milk

Pin It!

Tuesday, May 31, 2011

The Girls' Fund

Please head over to Shimelle's blog today for a wonderful opportunity to be inspired and to help girls all over this beautiful world of ours. :)
Pin It!

Tuesday, May 24, 2011

The Butterfly Stamp + Embroidery

For today's installment of "Stamping and Beyond," we bring you Shimelle Laine and her gorgeous embroidery skills . . .

The butterfly stamp is my very favourite - of course - and it's a perfect size for baby gifts. Of course, you could also adapt this idea to a larger garment, perhaps with a flock of butterflies! But for this project, I stamped the butterfly just once on a newborn sized onesie.


I stamped in pink then used three strands of embroidery floss to outline the full butterfly. I find it easiest to stitch on knit fabrics with a hoop, but it's best to stamp without the hoop so the design will be in the right place and not distorted. I just pop a piece of scrap cardboard inside the item so it's easy to stamp on the knit. Once you add the hoop, pull it taut but not tight - you don't really want to stretch the design.


The butterfly is a quite detailed stamp, so you could spend a long time following all the lines with your stitches! I opted to just add a bit of the detail in the top and bottom of the wings, then some wording across the middle. For the lettering, I just wrote in pencil and stitched over my letters. If that's too hard to judge, you could use letter stamps as a guide or print it out on paper and hold it up to the window and trace through the fabric.


The stamp ink will fade with several washes (unless you use special fabric inks) but I like this design both with the ink and with just the outline, so I don't mind if it fades. (Of course it's not for me so really I should just hope that baby and her mama don't mind!)

In progress . . .


Beautiful! Thanks for the inspiration Shimelle!
Pin It!

Friday, May 6, 2011

Spring Training: Photobooth Strips

Are you ready for your spring training workout today? Ella Publishing Co. has a video tutorial for you on creating faux photobooth strips.


And here Shimelle Laine has a delightful layout featuring the real deal photobooth pics. Awesome inspiration all around!


Pin It!

Thursday, April 28, 2011

Shimelle Laine in THE Dress


It's a very inspiring day today with Shimelle Laine and the Be Our Guest collection . . .

My first chance to play with all the new goodies from the Be Our Guest collection!

I started with the pink check as the background. Love that the new cardstock-weight paper makes it great for a page background without any extra cardstock. Perfect!

Then stamped the ledger design with fountain pen ink in the bottom corner, and used two journaling cards in this cluster of embellishments - the pink silhouette from Be Our Guest and also the red carnation from an earlier pack. I write my journaling on the blue ledger paper from Be Our Guest and cut it to fit a glassine envelope, then added some black floral ribbon (American Crafts) to the journaling for more dimension. There's also a button card in there as an embellishment. Just inked the edges and left the buttons as they came. Of course there's also an embellished butterfly there and there's a JBS pearl sticker on the flower with a smaller butterfly sticker at the top left corner. The 'photographs' stamp is one I found at an antique fair for £1, and I stamped it with fountain pen ink on a scrap of old book paper.

The journaling is all about the dress and its quirks. I wanted something not long but not actually 'short'. I wanted white with some colour (preferably pink). I wanted sleeves even though it was summer. And a peter pan collar. And in the end I found all of that in one dress by a London designer, Candy Anthony. Once I found the dress, everything else fell into place!

Other supplies - Thickers letters for the title (American Crafts), Martha Stewart border punch, House of 3 diecut in the top left corner and some elastic cable by Making Memories. The photo is by SJ Dowsett. (Scrapbooking brides: put your dress back on just a bit after the wedding/honeymoon and get a scrapbooker to take pictures of you. You will be so very glad you did.)


SO Beautiful! Thanks for the inspiration Shimelle!
Pin It!

Tuesday, March 8, 2011

Sights of Nara by Shimelle Laine

It's another scrapping adventure from the desk-cam of Shimelle! She writes, "I love kraft with Jenni's signature red and black papers! In addition to the patterned papers, I mixed JBS crepe paper with the scalloped edge and the scallop border stamp (inked with the paint dabber) here and there for a bit of a border."


JBS supplies: red/black patterned papers, red butterfly rub-on, small chipboard butterflies painted with re paint dabber, label stickers, chalkboard letter stickers, black
Pin It!

Thursday, February 10, 2011

Sparkle Video by Shimelle Laine

A sweet wedding layout by Shimelle Laine featuring a lovely Soap Powder Paint Dabber border with tiny butterflies, buttons, and flowers. I think her journaling makes this perfect, "Hilariously there are no photos of our wedding rings on our wedding day, because we forgot them. But really, I still smile when I look at my own hands."

And of course, Shimelle is always thinking of fun and innovative ways to share her scrappy skills with us. She's installed a camera above her workspace and has a timelapse video of creating this layout to share with us today. So fun! Thanks for the inspiration Shimelle!


P.S. Check back this evening for gallery updates!
Pin It!

Tuesday, November 30, 2010

Video Tutorial from Shimelle Laine

Today we have an absolutely darling video tutorial from Shimelle Laine. This one is sure to have you in the spirit to welcome December in with open arms. If you are looking for even more ways to make merry, check out her class "Journal Your Christmas." We think you will like it, especially as she will have a few more of these charming tutorials featuring JBS product there. :)


P.S. If you haven't already, be sure to enter the May Arts giveaway HERE. Then hope on over to their blog to enter in another fabulous May Arts + JBS giveaway! AND we'll be back with another project for May Arts week later today!
Pin It!

Wednesday, November 3, 2010

Glee! with Shimelle Laine

*Note: The GIVEAWAY below is still open!!!

This is a story I will tell at a greater length in my album or maybe a minibook, but I had this single photo and really wanted to use this as a title. Earlier this summer I planned a trip home and my parents are musicians so I asked when they were playing so I could catch a good performance while I was in town. Somehow from that simple question, the one that returned was 'can you be in the show?' and suddenly I found myself back in the land of singing and dancing on stage. When I told my friends back home, one of them said 'it's just like your life is an episode of Glee!' and there we go... it had to go in the scrapbook!

For this page I used the new Red and Black extension from JBS - four of the mini papers, two strips cut from the 12x12 papers and a journaling card. Plus red label stickers, small round letter stickers, chalkboard letter stickers in red and black and a black vintage sew-on button. And some red paint to finish!

Delightful good fun! Thanks for the inspiration Shimelle! I hope you will take the time to check out Shimelle's blog. She has an amazing journaling class, True Stories, going on right now and her annual Journal Your Christmas is starting very soon!
Pin It!