

I'd like to show you the process I used to create one of my favorite types of mini books. If you use a selection of Jenni Bowlin clear stamps with the Fiskars Easy Stamp Press, you can create unique book after unique book with these supplies and the "origami poem" folding method.
The book is based on folding a piece of paper to make an 8 page mini book. You can see the instructions for folding this little album at Origami Poems Project at this link. You can also see how I used the same folding technique to make a mini from a 12 x 12 sheet of paper here.

which coordinated with the Composition Book clear stamp from a previous release:

Other stamps that are approximately the same size can work also:

The various stamps are arranged on the Fiskars Easy Stamp Press to create the mini album and can be rearranged, mixed and matched to make different albums each time.


1. Arrange the stamps on the Press in the configuration shown below.
(I arranged my stamps as shown a little different than in the linked video - there are a couple of different ways to arrange - you just need to fold so the cover is in the front)
Note that one side of the Stamp Press needs to have stamps arranged upside down.


2. Ink your eight stamps. You can ink them all the same color or ink them different colors. A tiny edge of 2 of the stamps on the edge will hang over the press. You will just need to make sure you ink and press these edges.


3. Turn the press over and place it over the paper you want your mini to be stamped on and simply press down on the station. Make sure to press the stamp edges that are hanging slightly over the press.

4. You can rearrange and change up the stamps on the press to create different combinations for the mini books.
5. Cut out your stamped image making sure to cut even margins all the way around.
6. Score and fold in between each stamp to create folds as in the Origami Poems video. Make one cut to the mini also as shown (cut is on the red line).

8. You can now embellish your stamped image as you wish.
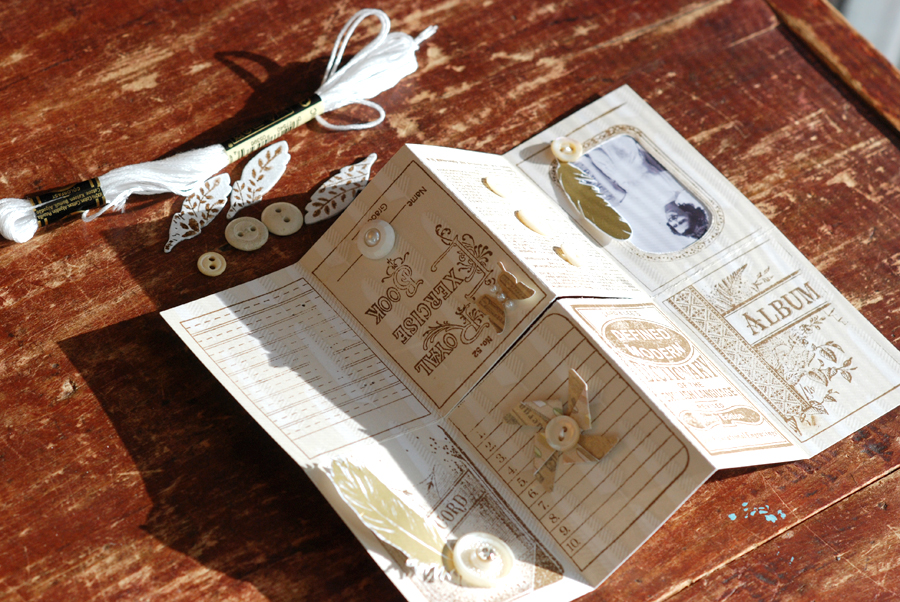
I made a mini album using a photo of my grandmother and some of my favorite white buttons that belonged to her. I used punches, rub-ons, chipboard, and bling to embellish.


Supplies:


darling~I'll need to try this!
ReplyDeletewow..that is really neat. I love it. And you made it seem so simple. I have to try to do this....
ReplyDeleteThis is sooo pretty!! :) Evie
ReplyDeleteVery cool...love it. I'm a big fan of my Easy Stamp Press.
ReplyDeleteWHOA -- Betsy, this is such a beautiful creation!
ReplyDeleteWhat a great tutorial and an absolutely stunning result. This album is sure to be treasured.
ReplyDelete